Rethinking Classifying Quadrilaterals
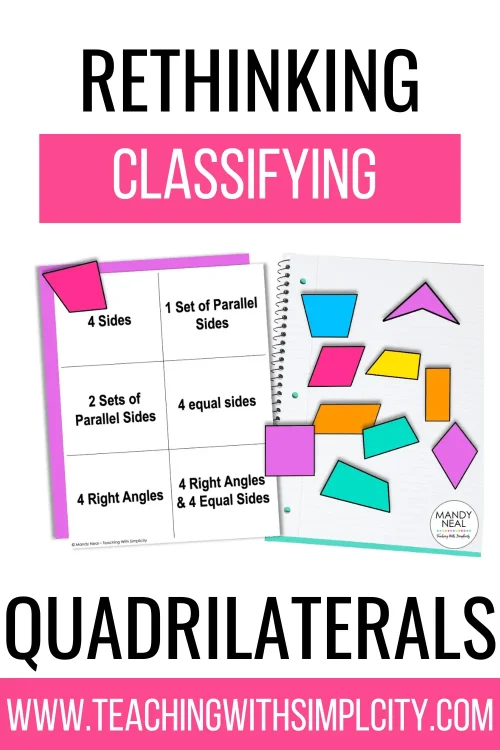
Teaching elementary students how to classify quadrilaterals can be tricky. Students tend to get stuck on what a particular quadrilateral “should” look like, not its attributes. To overcome this challenge, I choose to begin having students classify quadrilaterals by leaving out their names and what they look like. I have them only focus on the attributes for two days before the names are introduced. Also, our hierarchy does not contain a visual of the quadrilaterals. I do not want my students to get stuck on what they “should” look like.
Introducting Lines and Angles
Before tackling classifying quadrilaterals, it’s essential to ensure students have a solid grasp of lines and angles. Begin by explaining the basic types of lines—parallel, intersecting, and perpendicular. This video is catchy and easy for students to understand. Use everyday objects or simple drawings to illustrate right, acute, and obtuse angles. Encouraging students to identify these angles in their surroundings can make the learning experience more relatable and engaging.
Example activity:
- Have students draw two lines intersecting at different angles and discuss the type of angle formed. This hands-on approach helps them visualize concepts better.
Exploring Quadrilateral Attributes
Once students are comfortable with lines and angles, introduce them to classifying quadrilaterals by their attributes . A quadrilateral is a polygon with four sides, and its types include trapezoids, parallelograms, rectangles, rhombuses, and squares. However, refrain from showing them visual representations or naming these shapes at this stage. Instead, focus on their defining attributes:
- Trapezoid: Has exactly one pair of parallel sides.
- Parallelogram: Opposite sides are parallel and equal in length.
- Rectangle: Opposite sides are equal, and all angles are right angles.
- Rhombus: All sides are equal, with opposite sides parallel.
- Square: All sides are equal, and all angles are right angles.
Why Focus on Attributes?
1. Encourages Conceptual Understanding
Attributes help students understand what makes each shape unique. They learn to classify quadrilaterals based on properties such as sides, angles, and symmetry rather than relying on a specific depiction or orientation.
2. Develops Flexible Thinking
By emphasizing attributes, students learn that shapes can appear in various forms. This promotes flexible thinking and helps them recognize quadrilaterals in different contexts, which is crucial for real-world problem-solving.
3. Prevents Misconceptions
Visual examples can lead to misconceptions. For instance, if students only see rectangles as stretched-out squares, they might not recognize that a square is also a rectangle. Focusing on attributes ensures that students can identify all rectangles regardless of orientation.
4. Enhances Analytical Skills
Discussing attributes instead of showing pictures encourages students to analyze and articulate their understanding. They can compare and contrast different quadrilaterals based on their properties, enhancing critical thinking skills.
Quadrilaterals Can Have More Than One Name
Teaching students that quadrilaterals can have multiple names further enriches their understanding. For example:
- A square has all the properties of a rectangle (opposite sides equal, all angles 90 degrees) and a rhombus (all sides equal), making it both a rectangle and a rhombus.
- A rectangle and a rhombus can be considered a parallelogram because their opposite sides are parallel.
Understanding these overlaps helps students see the connections between different geometric concepts and appreciate the flexibility within geometry.
By focusing on attributes and the multiple names of quadrilaterals, you can equip students with a deeper, more adaptable understanding of geometry that extends beyond mere memorization or recognition.
Hands-On Learning with Geoboards
Geoboards are a fantastic tool for visual and tactile learners. Provide each student with a geoboard and rubber bands and challenge them to create quadrilaterals based solely on the attributes you’ve discussed. Remind them that while their shapes may look different, they belong to the same category if they follow the given attributes.

Sorting & Classifying Quadrilaterals by Attributes
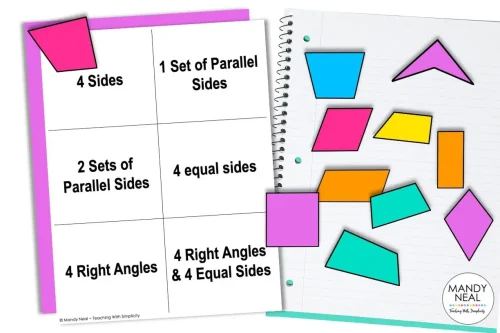
Next, give students a set of various quadrilaterals and ask them to sort them based on their attributes. At this point, continue to avoid using the names of the shapes. This exercise encourages students to rely on their understanding of attributes rather than visual cues.
Discuss why certain shapes belong together, emphasizing that their attributes classify them into the same group even if they look different.
Revealing the Names of Quadrilaterals
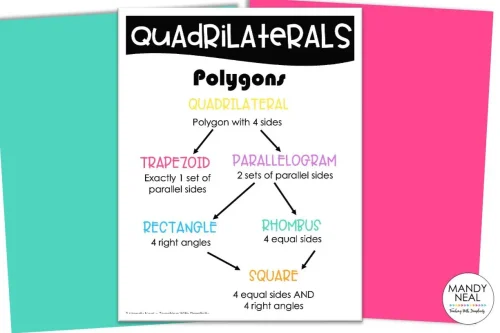
Once students have a firm grasp of quadrilateral attributes, introduce them to the names of these shapes. Begin having them classify quadrilaterals by relating each name to the attributes they’ve learned—trapezoid, parallelogram, rectangle, rhombus, and square—and explain the significance of each classification.
Example activity:
- Show students a diagram with labeled quadrilaterals and ask them to match the names with the shapes they previously created on geoboards. This reinforces the connection between theory and practical application.
Building Confidence and Mastery with Classifying Quadrilaterals
By the end of these classifying quadrilateral lessons, students should feel confident classifying quadrilaterals based on their attributes. Encourage them to continue exploring geometry in real-world contexts and to practice identifying these shapes in their environment.
To further engage students, introduce them to fun challenges like designing their own shapes or puzzles using the quadrilateral classifications they’ve learned.
Incorporating these strategies will not only help students master classifying quadrilaterals but also spark their curiosity and love for mathematics, and they fit perfectly into Math Workshop!


